During the cold war London was divided into 4 (later 5) groups, each reporting directly to Kelvedon Hatch, in turn each group was subdivided into the individual boroughs, each of them having its own control centre. The South East Group War HQ at Pear Tree House, SE19 had six sub-controls, Greenwich, Bexley, Bromley, Croydon, Lewisham & Southwark. The Southwark control, designated 51C5 was located beneath a health centre at the junction of Peckham Road and Vestry Road, SE5, almost opposite Southwark Town Hall.
After closure, the health centre was demolished in the late 1990’s because, according to the Southwark EPO, local children kept breaking in to it. The bunker below remains intact. The plot of land is now derelict awaiting redevelopment, one side of the stairway into the bunker below has been filled with concrete leaving a six foot drop onto the steps. A hinged grille has been fixed over the remaining part of the well and this is kept securely locked.
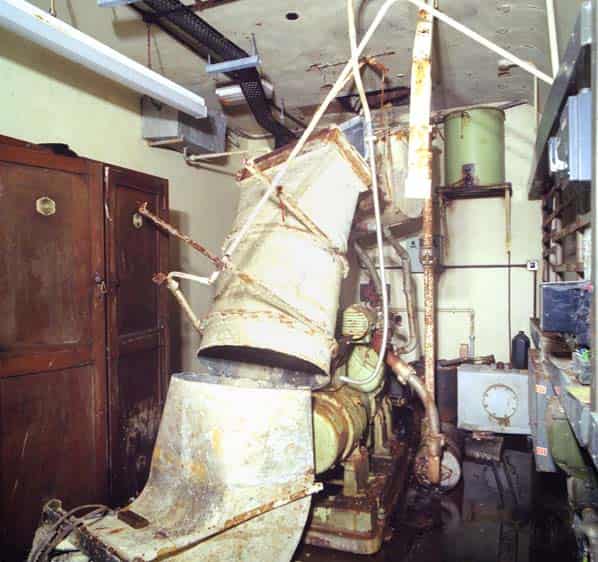
At the bottom of the stairs is a heavy wooden door giving access to the middle of the long arm of a ‘T’ shaped corridor. A second wooden door lies on the floor in the corridor, it is unclear where this came from, perhaps the top of the stairs. Turning left the corridor opens out into a lobby area. To the left there is a door with a plastic sign on the door that says ‘Generator Room’ (All the rooms have plastic signs on the doors). There is a 16 HP two cylinder 3 phase Lister Generator on the left and ventilation and filtration plant and electrical switchgear and control cabinets (made by Melvin Gerin) on the right. The lights on the control cabinets are on. There is a door directly into the canteen but this is locked. Next to the generator room at the end of the long arm of the ‘T’ is a room with a sign on the door that says ‘Room No 1 Support Sections’. There is a central supporting pillar in the middle of the room and various wall maps, now badly decayed. There is a large plastic message handling flow chart on the floor.
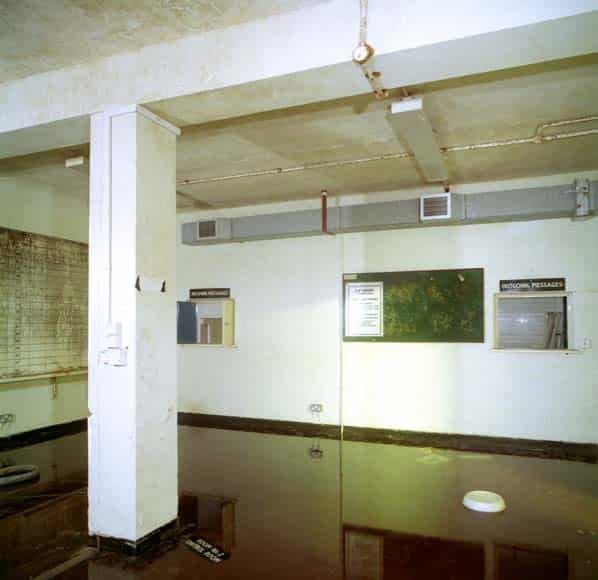
A door leads directly into ‘Room No. 2 Control Room’ which can also be accessed from the corridor. This contains decaying large scale wall maps along two walls, one is labelled ‘incident resources’ and another labelled ‘Incident Map’; this also shows rest centres. There is a large chart labelled ‘Board Plot’ divided into five columns with the headings ‘Time’, ‘Location’, ‘Action’, ‘Resources’, ‘DEPL’ and ‘ETR’.
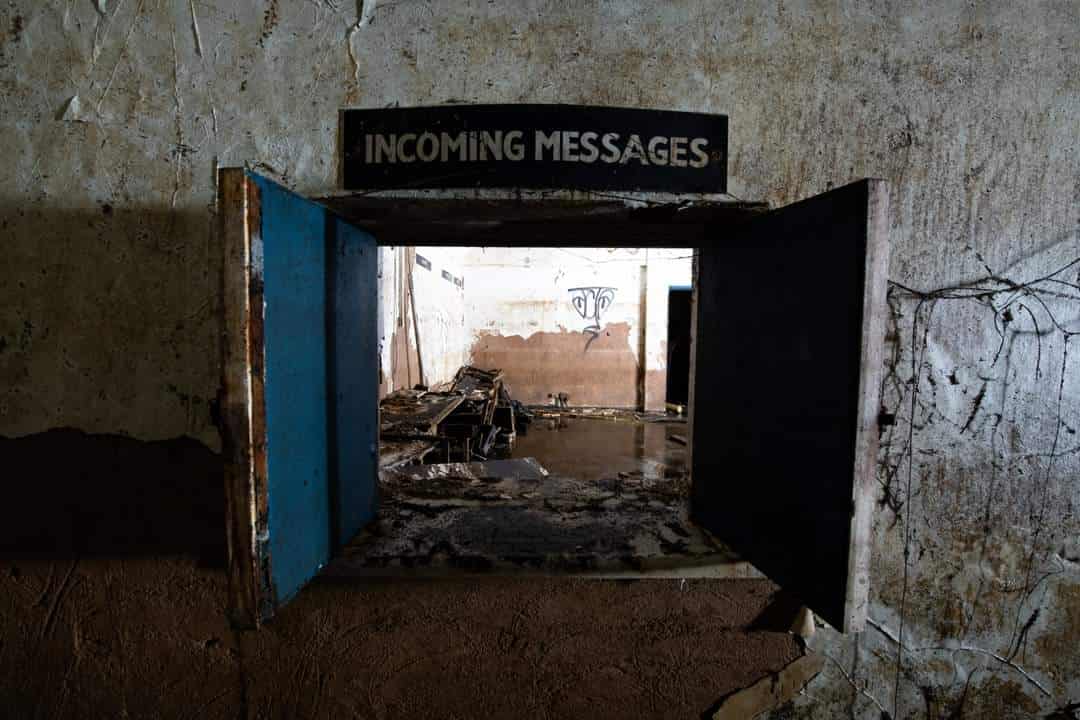
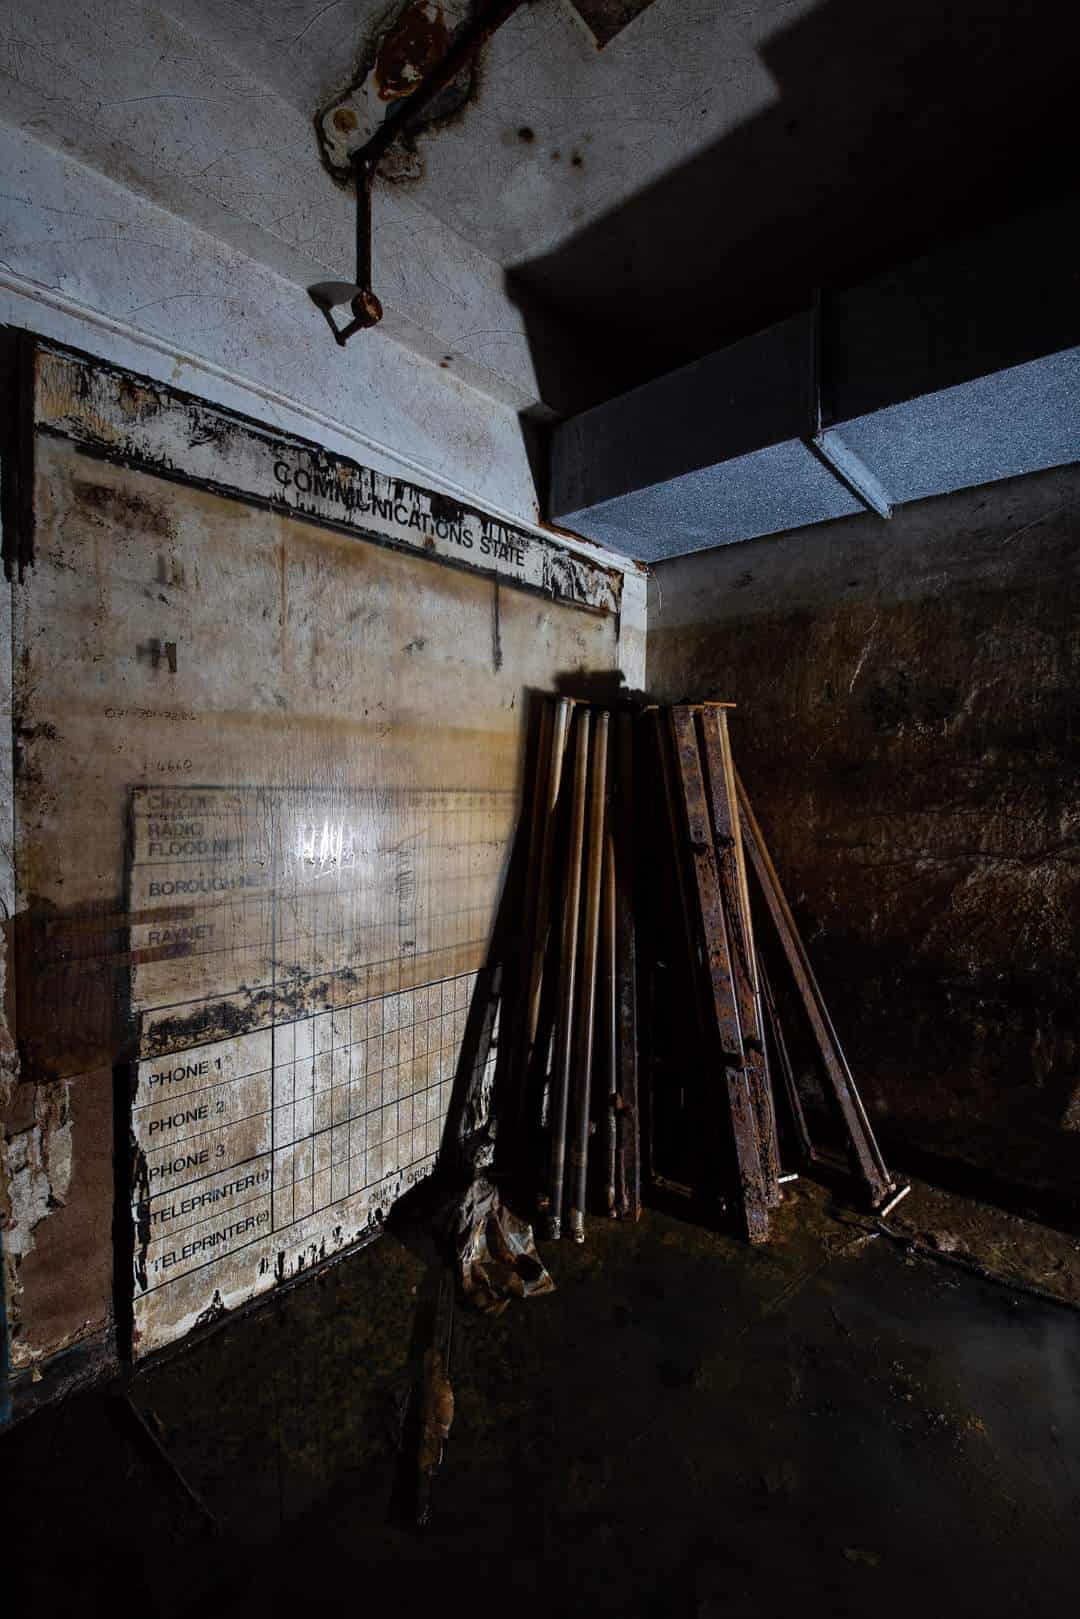
There are two windows into the adjacent room labelled ‘Incoming messages’ and ‘outgoing messages’. This room has ‘Room No. 3 Comcen - Communications staff only’ on the door. The room has five acoustic booths along one wall with signs above them reading ‘SE Group flood net’, ‘Borough net’, ‘Raynet’, ‘Tele. Op. 2’ and ‘Tele Op. 1’. There is another message handling flow chart and a board labelled ‘Communications state’. This is divided into 9 columns with the headings ‘UHF Emergency Borough net’, ‘UHF standby’, ‘Housing net’, ‘Raynet’, ‘VHF’, ‘FAX 0171 701 7286’, ‘Phone 1 4660’, ‘Phone 2 4661’, ‘Phone 3’, ‘Teleprinter 1’ and ‘Teleprinter 2’. There is a supporting pillar in the centre of the room with a sign on it that says ‘Filing & Progress Chaser’.
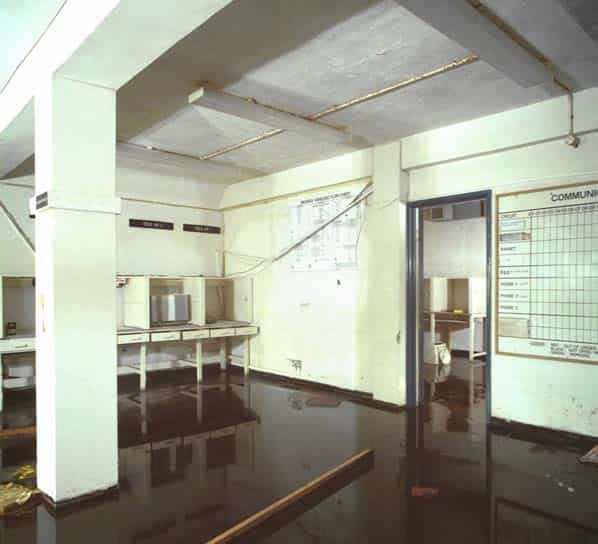
The next room along the long arm of the ‘T’ is ‘Room 5 Switchboard and Teleprinters’, this also has a door directly from the Communications Centre. It has an office desk and three acoustic booths. There are various BT junction boxes on the wall and a computer monitor and keyboard and printer on the floor. There is also an ‘Avtex Telex Manager’ on the desk. On the opposite side of the corridor alongside the entrance stairs is ‘Room No. 4 Canteen’. There is a serving counter and various wooden cupboards but all the kitchen appliances have been removed apart from the water heater. There is a locked door into the generator room.
Along the short arm of the ‘T’ corridor ‘Room No. 6’ is at one end. There is no other indication of the use of this room although it may well have originally been a dormitory. In later years the dormitories in control centres were often taken out of use and the rooms used for other purposes. The room now contains a number of filing cabinets still containing files and numerous papers. There are also several chairs and a low table. At the far side of the room behind a curtain is the emergency escape shaft consisting of a fifteen foot vertical ladder to an ROC style hatch. There is a long framed (and behind glass) ‘family tree’ style chart on the wall with the heading ‘Organisation - London Borough Wartime Headquarters’ At the head of the tree is the Borough Controller (Staff Officer Young) and under him the Deputy Controller (J. Parker) and the Assistant Controller Support Services (Cammies) and so on down the line.
Next to this room are the male and female toilets with all their fittings intact apart from sinks which have been removed. The toilets flush and the hot air hand driers still work. The final room at the opposite end of the short arm of the ‘T’ is the ‘Store’. It is fitted with Dexion shelving and has a number of stores still in place including a large battery and charger, various small power supplies, tins of paint, vacuum cleaner various empty equipment boxes and an IBM 72 Golfball typewriter.
Throughout the bunker there is rubbish strewn but surprisingly, considering its location and the fact that it was open for several years, it has not been trashed and vandalised. There is a fairly pungent and unpleasant smell (not toxic) and the atmosphere is muggy and close, this was made worse when the wooden door at the bottom of the stairs was closed. Throughout the wood is painted blue. There are several inches of water on the floor throughout the bunker probably from rain coming through the open surface grille.