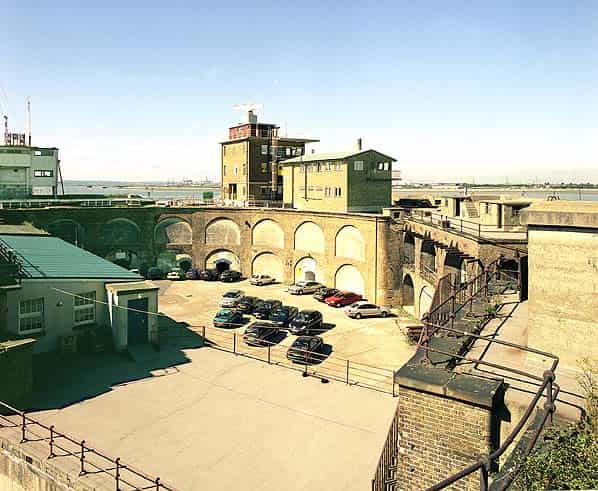
Royal Naval Auxiliary Service (RNXS) emergency port control for the Medway estuary was located at Garrison Point Fort in Sheerness Docks. In times of nuclear war these port emergency centres would have directed all major shipping out of a danger area and arranged access to and from ports for friendly vessels. The RNXS was set up in 1964 and the ‘bunker’ at Sheerness dates from around this time. It was established within the old magazines at the Victorian Garrison Point Fort within Sheerness Docks.
The fort occupies the extreme point of land at the north of the docks and it was designed to protect the narrow entrance of the Medway between Garrison Point and the Isle of Grain 800 yards away on the opposite side of the estuary. The fort was fully armed by 1872 with a mixture of 9" and 10" rifled muzzle loading (RML) guns in the casemates with 44 guns on two levels. It was rearmed during the first and second world wars and post war the lower casemates were used for storage and coastguard facilities and now house the Medway Ports office. A boarding tunnel for continental ferries (no longer running) passes through the upper casemates blocking them off. Following the formation of the RNXS a section of the lower casemates and the magazines below were converted into a bunker to house the port control.
Access to the bunker is through an ordinary wooden door, from a covered way off the fort parade ground. Just outside the door is a small brick building containing the standby generator. The door opens directly into an office to the left is the galley, straight ahead is the canteen/rest room and to the right the toilets. The galley still retains a stainless steel sink and draining board, food preparation surface, cupboards and a counter below the serving hatch into the rest room. The office and the canteen are empty although there are some remnants of the original use for the room as a gun casemate with chains on the walls. To the right of the office are the male and female toilets within another casemate and close by is the filter room which only consists of is one filter in the ventilation trunking.
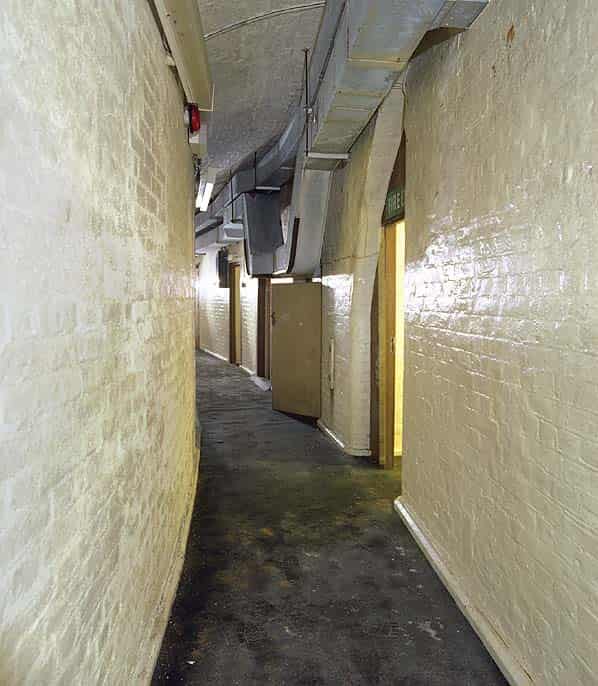
An original stone spiral staircase gives access to the lower level of the bunker in the magazines. A section of the circular passage around the fort has been walled off, this includes a section of the circular narrow lighting passage that runs round the back of the magazines. (In a Victorian fort a lighting passage would contain glazed windows into the magazines where an oil lamp could be placed. This would throw light into the magazine but the glass would stop the flame igniting the powder stored in the magazine). At the bottom of the staircase the old magazines left and right have been converted into the bunker. All the rooms were completely stripped when the bunker closed in 1992 and all that is left is the ventilation trunking running into each of the rooms. The power is still on in most of the rooms and corridors although the tunnels are damp with mould on the carpets.
At one end of the main curved corridor are emergency exit stairs back up to the parade ground and another corridor linking to the lighting passage. There are two rooms to the left of this corridor, the first was the ‘radio room’ and the second room was the ‘teleprinter room’ which is accessed through a small lobby. On the wall of the lobby is a cabinet containing two interference capacitors which would have given the wiring EMP protection.
On the opposite side of this corridor is one of two entrances into the ‘control room’ which is ‘T’ shaped with one of the arms of the ‘T’ much shorter than the other. The back wall is painted black. This is where the maps would have been displayed and there is fluorescent lighting angled on to this wall.
Back in the main corridor there is a second entrance into the control room. Other rooms accessed from this corridor include an armoury, staff officers room, workshop, training room and a communications room for DEFPA (Defence of Ports and Anchorage’s) controlling the defence of the ports with a direct line to Eastern Command. At the far end of the main corridor is a second corridor linking to the lighting passage with one room on the left hand side.
Access to the rest of the old magazines within the fort has been blocked as have two shafts up to the casemates which contained ammunition lifts. One of these shafts have been used to run cables. All the windows in the lighting passage have also been bricked up although there is a recess in one wall that would have housed a lamp for lighting the passage itself.
Those taking part in the visit were Nick Catford, Keith Ward, Bob Jenner, David Mapley and Robin Ware.