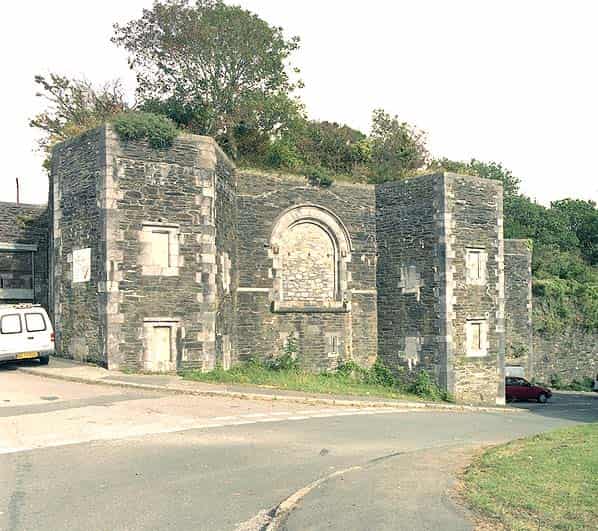
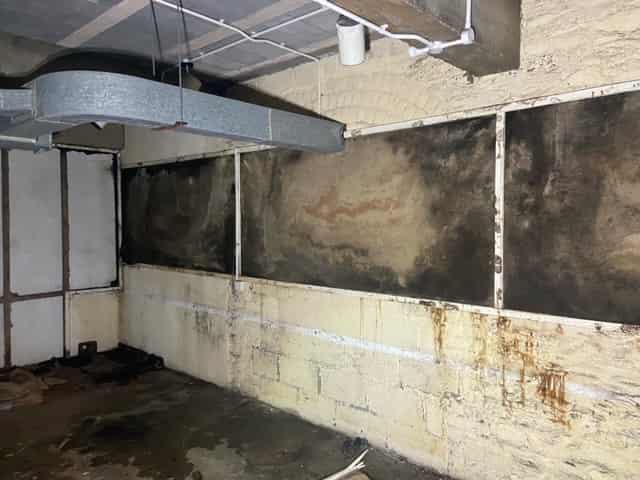
When controls were reactivated in the 1980’s, the Borough Control was once again re-located to the gatehouse at Fort Austin which had been the Borough works depot since the 1960’s. Fort Austin is one of a ring of forts built during the 1860’s to defend the city. The gatehouse consists of a three storey stone building set into the walls of the fort. There was a drawbridge on the middle level with a road running through the middle of the gatehouse into the parade ground. The works depot offices are now located in the parade ground utilising a number of old WW2 huts. The entrance arch was walled up with stone and the roadway formed one of the rooms in the ‘bunker’. This bizarre conversion was completed in 1984 when the new centre was activated. It was always, and still is damp with all the maps placed behind plastic sheeting on wallboards.
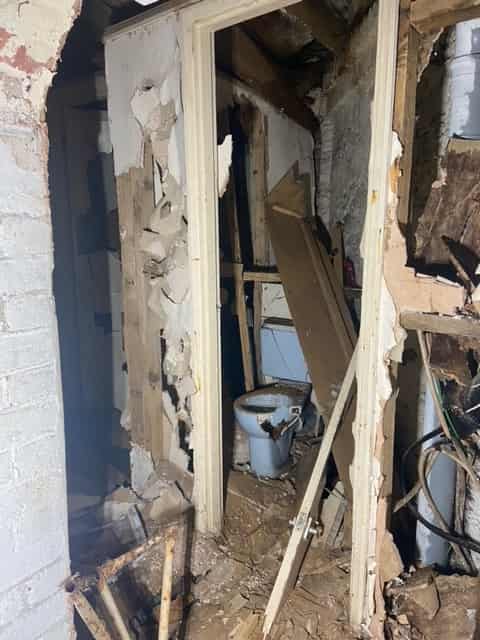
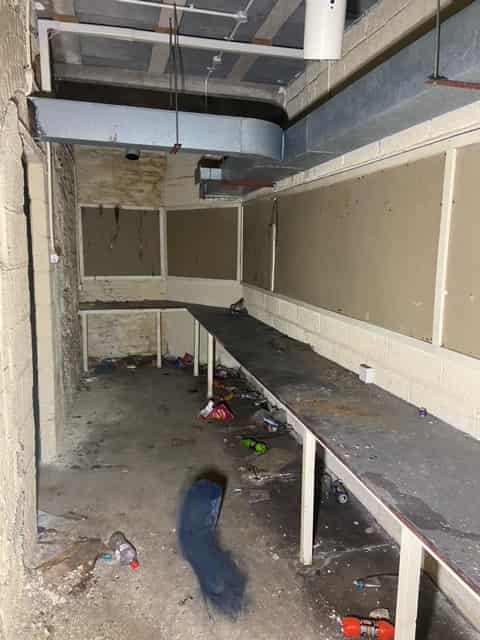
The Borough Control, later the Borough Emergency Centre remained operational until 1992. From 1984 to 1992 the bunker also acted as the Devon County Standby Emergency Centre (to County Main at County Hall, Exeter). Most standbys were collocated at a District council control. Since 1992 it has been used for storage and housed a youth club but is now abandoned and derelict. Raised wooden floors in the toilets are rotten, all the stone floors are damp, the electricity supply has been disconnected and many of the original fittings have been removed although there is a lot of rubbish, much of it redundant computer hardware, strewn across the floor on the upper level.
The bunker utilised the lower two floors of the gatehouse. The upper floor which consisted of defendable embrasures in the wall linked by a cross passage and is accessed from the floors below by two spiral staircases which remained unused although still accessible. The embrasures were blocked up.
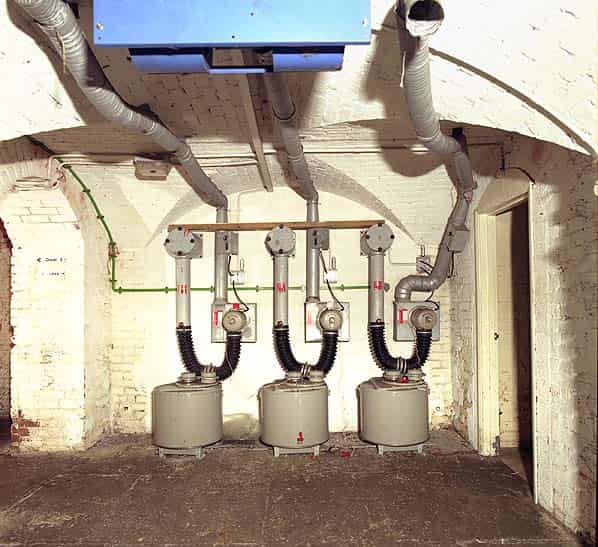
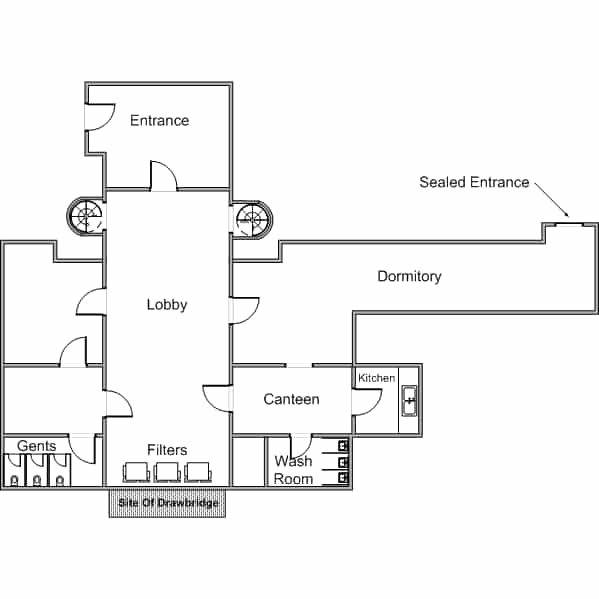
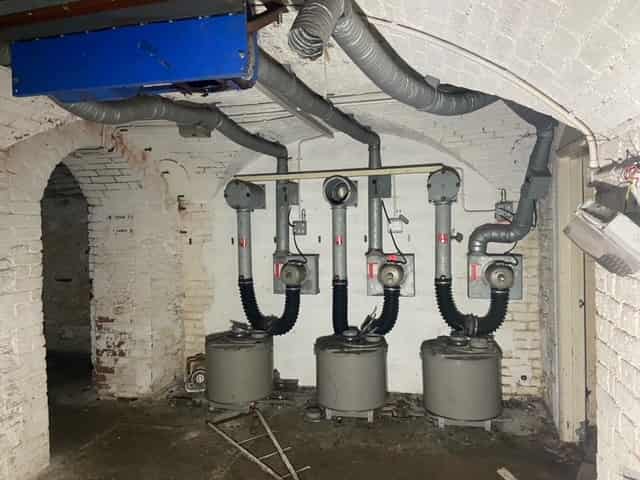
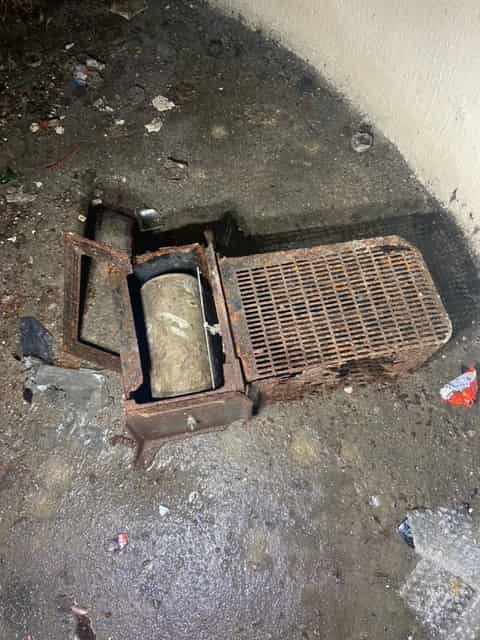
The entrance to the ‘bunker’ is through an offset wooden door at the rear of the gatehouse, there is no additional blast or gas protection of any kind. The original wide entrance roadway has been converted into three rooms with wooden partition walls. The entrance room, a long room or lobby that gives access to all other parts of the bunker with a spiral staircase up and down on each side and at the back one of two ventilation and filtration plant rooms. This still retains it’s Swiss Andair filtration equipment consisting of three filtration units, trunking around the upper level and an intake fan. The plant appears to be in good order. There are doors left and right from the filter room into side rooms. It is now impossible to allocate a definitive use to most of the rooms in the ‘bunker’. The room to the right of the plant room is a large rectangular room that is now strewn with rubbish, much of it computer hardware, there are also 8 unused pressure relief valves. On the south side of the room (towards the front of the fort) are the male toilets with the words ‘Gentlemen’ in large letters on the wall. There is a step up into the toilet area where the wooden floor which is now rotting badly. There is a single hand basin and three cubicles, each with a chemical toilet installed. There are pressure relief valves in two of the cubicle walls. On the opposite side of the rubbish strewn room there is another room of similar dimensions with a door back into the central lobby.
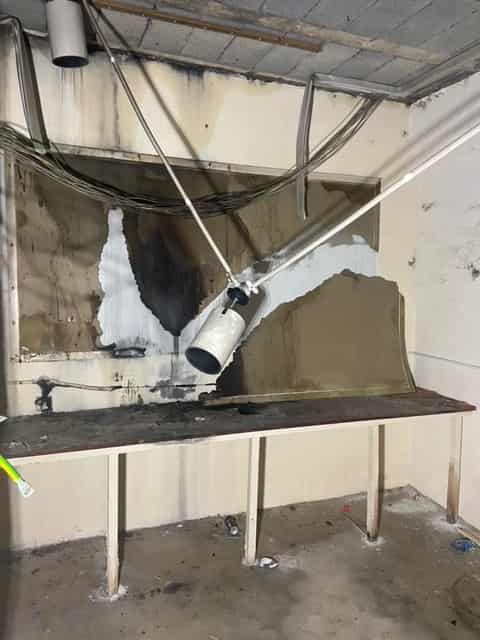
On the left of the plant room is a similar sized room that probably acted as a canteen and rest room. To the right is another room that should have been the ladies toilets. It has three hand basins and three cubicles but each cubicle has another hand basin plumbed into the mains water supply so it must have been some kind of wash or decontamination room. There are no showers anywhere in the bunker. The canteen also gives access to the kitchen which has two stainless steel sinks and draining boards, a small refrigerator and cupboards around two walls with a food preparation table on top. There is a pressure relief valve in the wall above the sinks. There is a wide doorway on the left hand side of the canteen into a room that can also be accessed from the central lobby. This room has a wide dog leg into a long narrow room that was originally a rear entrance passage into the gatehouse. The original doorway at the far end has been bricked up and the passage was used as the dormitory.
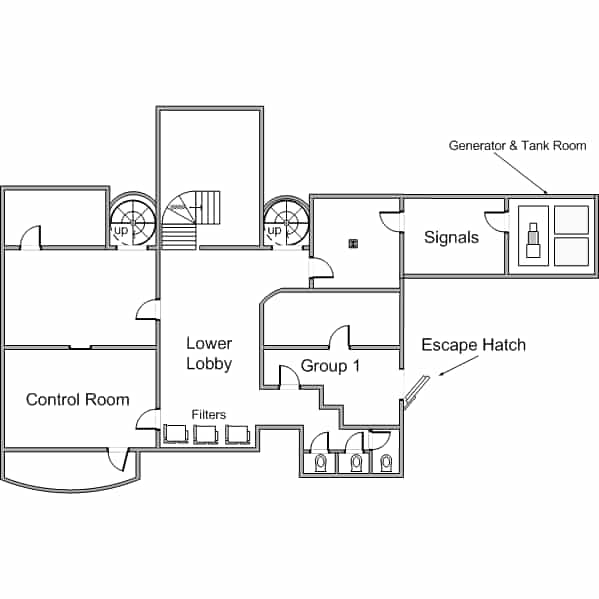
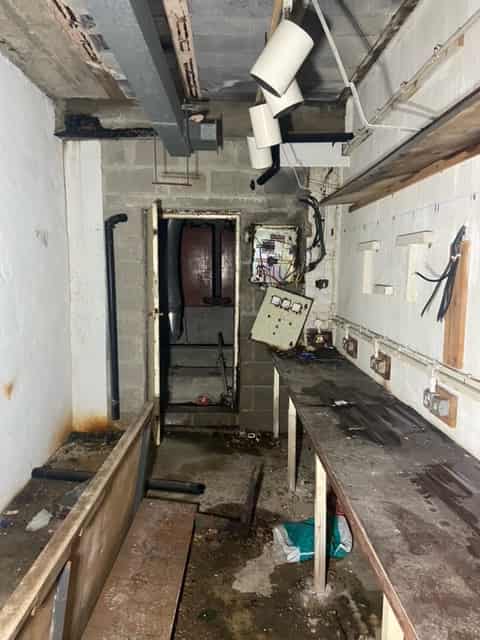
The bottom level housed the operations rooms. It is bigger than the floor above with more rooms and is accessed from the two original spiral staircases on either side of the entrance lobby. One of these opens onto a lower similar sized lobby with electrical switchgear on one wall and a duplicate set of Andair filtration equipment on the end wall. There is a second fan and ventilation trunking running into all the rooms on this level. On the left of the lobby there is a glass message window into a rectangular room with a brick supporting pillar in the centre. There are tables jutting out into the centre of the room, in line with the pillar and tables along one wall adjacent to the message window. On one of the tables there is a plastic sign with arrows, left to ‘signals’ and right to ‘Groups 1, 2 & 3’, it is unclear where this sign was originally placed (perhaps on the lower lobby wall) and what Groups 1 2 & 3 refer to. At the back of the room there are several BT junction boxes and a doorway into what was probably the signals or teleprinter room. This room has a table along one wall with five power sockets and switches evenly spaced out along the wall above the table. There are five lights on the ceiling angled on the five positions.
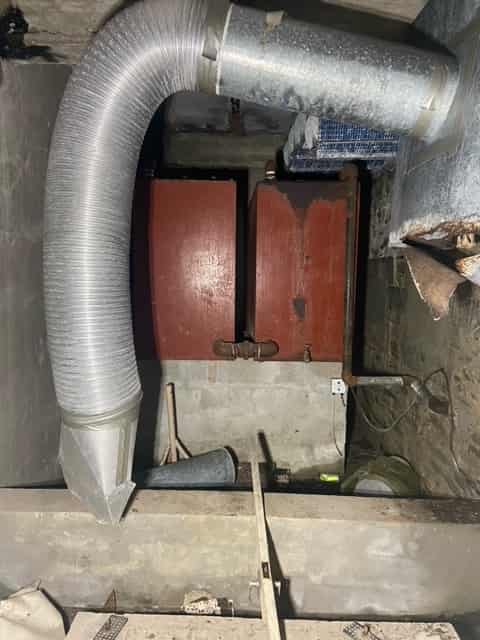
In the back wall there is a small electric control cabinet that controlled the standby generator. The generator room was accessed from the back of the signals room. The generator has been removed although it’s concrete plinth remains along with exhaust trunking, two fuel tanks and a bank of filters high up in the wall. The steel door into the generator room has a gas seal.
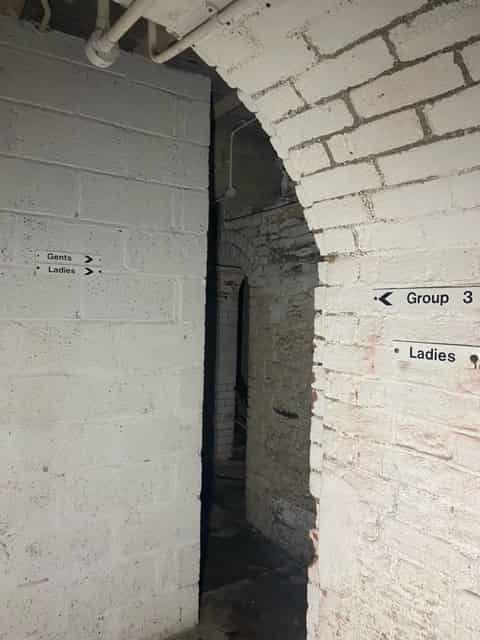
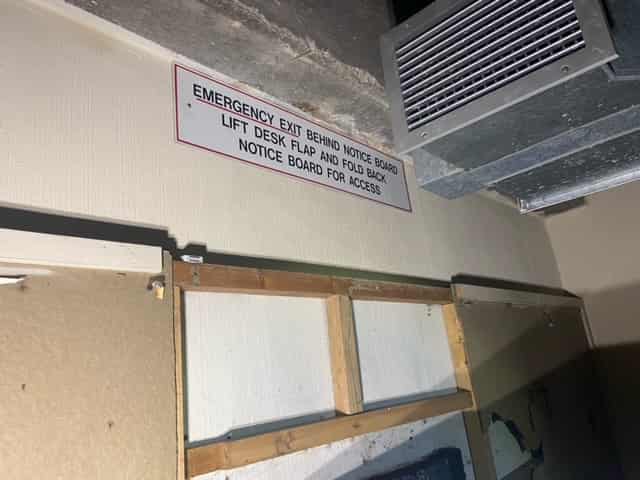
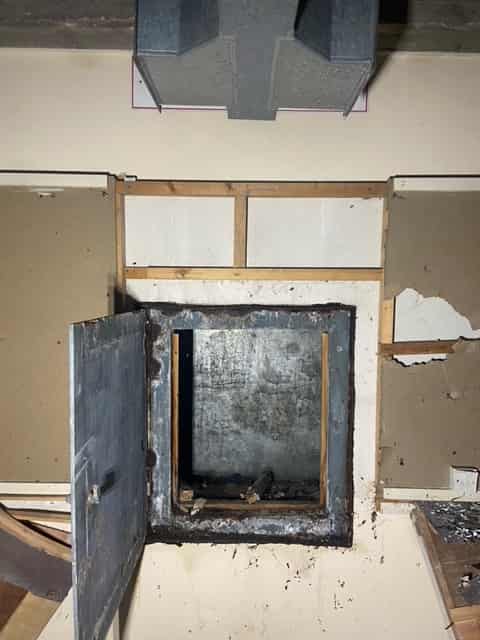
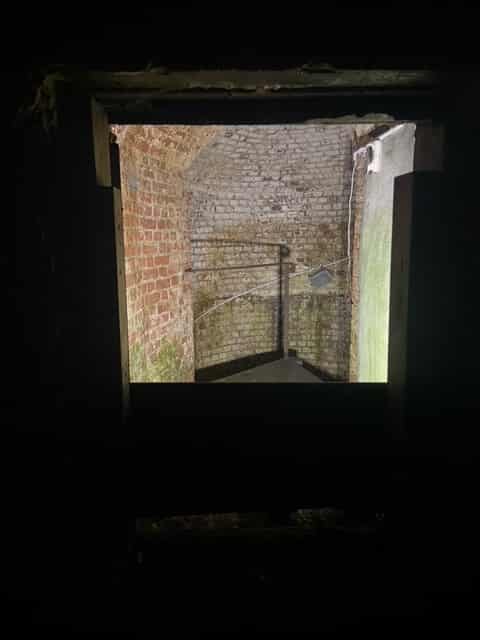
Back in the lobby there are signs on the left hand wall pointing to the male and female toilets and ‘To Group 3’ The toilet is unisex with three cubicles contained in a single room that has two hand basins. Two of the cubicles have flushing toilets (working) and the third has two chemical toilets stacked on top of each other. Two of the cubicles have pressure relief valves in the back wall. Group 3 consists of two rooms one accessed through the other. The outer room has tables along two walls with wallboards above them. In the middle of one wall, raised three feet up is a steel plate door that formed the escape hatch. This is approximately 2' square. Beyond it on the outside of the fort wall is a similar door. There is daylight showing around the edges so there is no gas protection. The inner room has tables along one wall, a wall board and a filing cabinet.
On the opposite side of the lower lobby there are two doors into what were probably the operations rooms. The southern room has wallboards along two walls and tables along one side. On the opposite (south side) a door way leads into a small irregularly shaped room with wallboards around the walls. The second of the two operations rooms is of similar dimensions but has a small alcove. The second spiral stairway enters this room. Alongside the stairway is a small room with one wall board, this is the only board in the bunker still to retain a map, this is a street map of Plymouth with a Perspex overlay standing on the floor alongside.
The final room is accessed down a short flight of stairs from the back of the lower lobby, this was originally a small magazine used by the men defending the gatehouse. It still has a lighting ‘window’ looking into the room. The room is empty apart for a small cage for holding a human body. This modern instrument of torture was presumably brought into the bunker by people from the youth club.
Those taking part in the visit were Nick Catford, Keith Ward and Mike Thomas.